How to Make a Circle Profile Picture (Round PNG, Free)
Published August 11, 2026
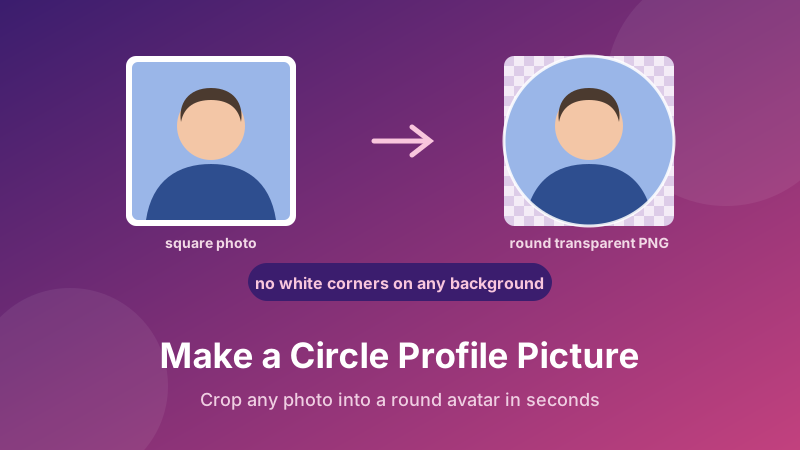
You upload a photo as your profile picture, the platform crops it into a circle, and half your forehead disappears. Or you paste a "round" avatar into a slide deck and four white triangles appear in the corners. Both problems have the same fix: crop the image into a circle yourself, save it as a transparent PNG, and stop leaving the decision to whatever the website feels like doing. This guide shows you how to do it in about twenty seconds, and what size to use so it looks sharp everywhere.
Make a round avatar now
Drop a photo in, pick a size, download a circular PNG with transparent corners. Free, no sign-up, and your photo never leaves your device.
Open the Circle Crop tool →Why platforms mangle your profile picture
Almost every social network, chat app and workspace tool now shows avatars as circles — Instagram, LinkedIn, Slack, Discord, Teams, Gmail, WhatsApp. But you upload a rectangle. The platform has to decide which part of that rectangle survives, and its rule is blunt: take a square from the middle and mask everything outside a circle drawn inside it.
That works fine for a photo where you are dead centre and reasonably close to the camera. It fails badly when you are off to one side, when there is a lot of sky above your head, or when the shot is a wide landscape photo with you in it somewhere. Corners get cut, chins get clipped, and there is no way to nudge the crop after the fact on most platforms.
Cropping the circle yourself flips that around. You decide the framing before you upload, you see exactly what the circle will contain, and every platform then displays the same well-composed avatar — because you handed it a picture that is already square and already round.
Why it has to be a PNG, not a JPG
Here is the part people miss. A circle is round, but every image file is a rectangle. Something has to fill the four corners outside the circle. In a JPG there is no choice: JPG cannot record "nothing here", so the corners get filled with a solid colour — normally white or black. On a white website that is invisible and everything looks fine, which is why people don't notice until they drop the same file onto a coloured slide, a dark-mode profile card or a photo background. Then four hard triangles appear around the head.
A PNG stores an extra channel called alpha, which is a per-pixel note about how see-through that pixel is. In a proper circle crop, the corners have an alpha of zero — genuinely empty, not white. The image is then a clean disc that sits on any background: dark, light, patterned or photographic. That is exactly the same reason a signature image or a logo needs to be a PNG.
So the rule is simple: circular image → always PNG. If a tool hands you a "circle crop" as a JPG, it has not really cropped a circle. It has drawn a circle on a coloured square.
How to make a circle profile picture in Toolyard
The Toolyard Circle Crop tool is free, needs no account, and does all the work inside your browser. Here is the whole process:
- Open the Circle Crop tool. You'll see a drop area — drag your photo onto it, or click browse files and choose one. JPG, PNG and WebP all work, and you can drop several photos at once if you're making avatars for a whole team.
- Choose an output size. 512 × 512 px is the right answer for almost every profile picture. Pick 256 × 256 px if you need a small icon and want the smallest possible file, or Keep original square when you want maximum detail — for example if the same image will also be used large on a website.
- Check the preview. The tool takes the largest square it can from the centre of your photo and masks it into a circle, so you can see immediately whether the framing works.
- Click Download on the result — or Download all if you dropped in several photos at once. Each one saves as a PNG with transparent corners, ready to upload anywhere.
If the centre crop cuts off something important, don't fight it here. Crop the photo to a square first with the Image Cropper, positioning your face where you want it, then run that square through the circle crop. Two tools, still under a minute, and you get complete control over the framing. There's a full walkthrough in how to crop an image to an exact size.
What size should a profile picture be?
Platforms display avatars small — often 40 to 200 pixels across — but they store and re-serve a larger copy for high-resolution screens. Upload something too small and it looks soft and blocky on a Retina display; upload something enormous and you're just wasting upload time.
- 512 × 512 px — the safe default. Comfortably larger than any platform's display size, still a small file, and sharp on every screen. If you only ever make one avatar, make it this.
- 256 × 256 px — small and fast. Fine for internal tools, forum avatars, or anywhere the image is only ever shown at thumbnail size.
- 1000 × 1000 px or larger — only when needed. Useful if the same circular image will also appear big, for instance as a team photo on an About page. Otherwise it's overkill.
One thing to be aware of: some platforms re-compress whatever you upload, and a few flatten transparency onto a white background during that process. That's out of your hands, but uploading a properly transparent PNG still gives you the best possible starting point — and it means the same file works everywhere else, in your slides, your email signature and your documents.
One avatar, every platform
Crop it once at 512 × 512 and reuse the same transparent PNG on Slack, LinkedIn, Discord, your website and your slide decks.
Open the Circle Crop tool →Taking a photo that actually suits a circle
A circle is an unforgiving frame. It throws away the corners of your photo, which is where most of the context lives, and it draws the eye straight to the centre. A few habits make a big difference:
- Fill the frame with your head and shoulders. The classic avatar mistake is standing too far from the camera. At 40 pixels wide, a full-body shot is a smudge. Shoulders-up reads clearly at any size.
- Put your eyes slightly above centre. A centre crop keeps the middle of the image. If your eyes sit a little above the midpoint, the circle lands where a portrait naturally wants it.
- Leave a little breathing room. Don't let the top of your head touch the edge of the square — the circle cuts in at the corners, so anything close to the edge is at risk.
- Use a simple, contrasting background. Busy backgrounds turn to noise at small sizes. A plain wall or a soft-focus background keeps the face readable.
- Check it small. Zoom your browser out, or look at the thumbnail in your file manager. If you can't tell who it is at that size, the crop is too wide.
Other things a circle crop is good for
Avatars are the obvious use, but the same transparent circular PNG solves several other jobs neatly:
- Team pages. Round headshots in a row look consistent even when the original photos were shot at different distances and angles.
- Slide decks. Drop a circular photo onto a coloured slide and it sits on the background instead of punching a white rectangle into it.
- Logo badges and stickers. A round mark with transparent corners scales onto any surface without a visible box.
- Testimonial cards and email signatures. Small round portraits read as friendly and take almost no space.
If the resulting PNG is bigger than you'd like — transparency makes PNGs heavier than JPGs — run it through the Image Compressor afterwards. Just keep it as a PNG so the transparent corners survive; converting to JPG to save a few kilobytes puts the white triangles straight back.
Do I need Photoshop for this?
No. In Photoshop you'd draw an elliptical marquee with shift held down, feather it by a pixel, invert the selection, delete, and export as a PNG with transparency — perfectly doable, and completely unnecessary for a task a browser can finish in one click. Reach for a real editor when you want something beyond the crop: an outline ring around the circle, a drop shadow, a background swap or retouching. For the crop itself, a dedicated tool is faster and there's nothing to install.
Is it private and free?
Yes to both. The Toolyard Circle Crop tool is 100% private: your photo is drawn on an HTML canvas inside your own browser and the finished PNG is saved directly to your device. It is never uploaded to a server, never stored, and never seen by anyone. That matters for a profile picture, which is usually a photo of your face — the kind of file you shouldn't be handing to an anonymous website just to cut a circle out of it. The tool is completely free, with no sign-up and no watermark, and it keeps working offline once the page has loaded.
Frequently asked questions
How do I crop a picture into a circle?
Open Toolyard's Circle Crop tool, drop your photo in, choose an output size such as 512 × 512, and download the result. The tool takes the largest square from the centre of your image, masks it into a circle and saves a PNG with transparent corners — all inside your browser, with no upload.
Why does a circle crop have to be a PNG?
Image files are always rectangles, so the four corners outside the circle need to be see-through. Only PNG can store that transparency. A JPG fills the corners with a solid colour, which shows up as hard triangles on any background that isn't the same colour.
What size should a profile picture be?
512 × 512 pixels is the safe all-purpose size. It's bigger than almost any platform displays an avatar, so it stays sharp on high-resolution screens, and the file stays small. Go larger only if the same image will also be used big somewhere.
Do I need Photoshop to make a round profile picture?
No. A browser tool does the same job in seconds with nothing to install. Photoshop is only worth opening if you want to add an outline ring, a shadow, or retouch the photo itself.
Is it safe to crop photos online?
With Toolyard, yes. Your photo is processed on a canvas inside your own browser and the PNG saves straight to your device. Nothing is uploaded, stored or seen by anyone else.
Can I do several photos at once?
Yes. Drop in multiple images and the tool crops them all to the same size, then use Download all to save the set — handy for a team page where every headshot needs to match.